Check out the walkthrough for enrolling a person and their facial image into a Biometric API using Postman.
Cameras and motion/security sensors are increasingly common in our daily lives, present in mobile devices, for example. The simplicity of access has expanded the possibilities of using biometrics applications that often require only these devices as a form of authentication and process monitoring.
Behind this convenience is the presence of software that adopts biometrics as a verification method.
Choosing which software to use is a recurring challenge for developers. After all, which platform should I trust with data as sensitive as collected biometrics? Where should you start implementing? How can you test it?
Understand now in this tutorial!
1. Get access to the biometrics platform
To get started, create an account with the Biometrics API to receive an access key.
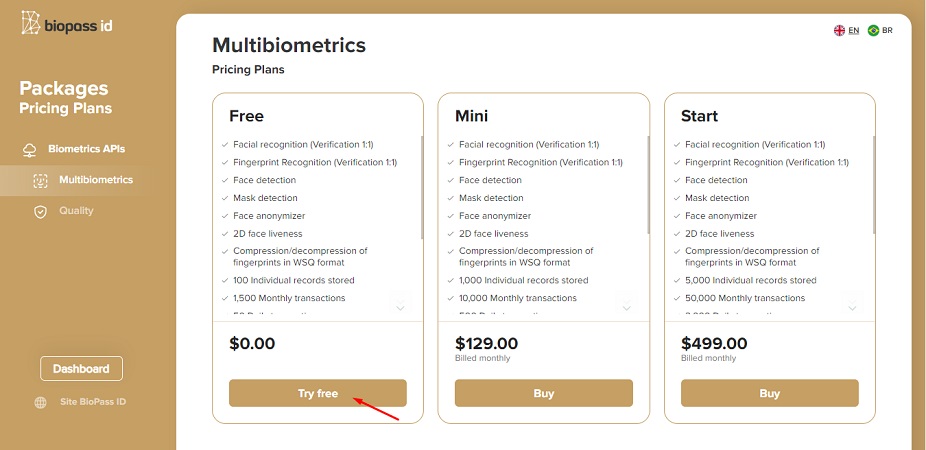
BioPass ID allows you to sign up without a payment method, and you can choose the free plan. This benefit makes it possible to test all the biometric identification features offered.
In this tutorial, we have chosen the Multibiometrics package as an example:
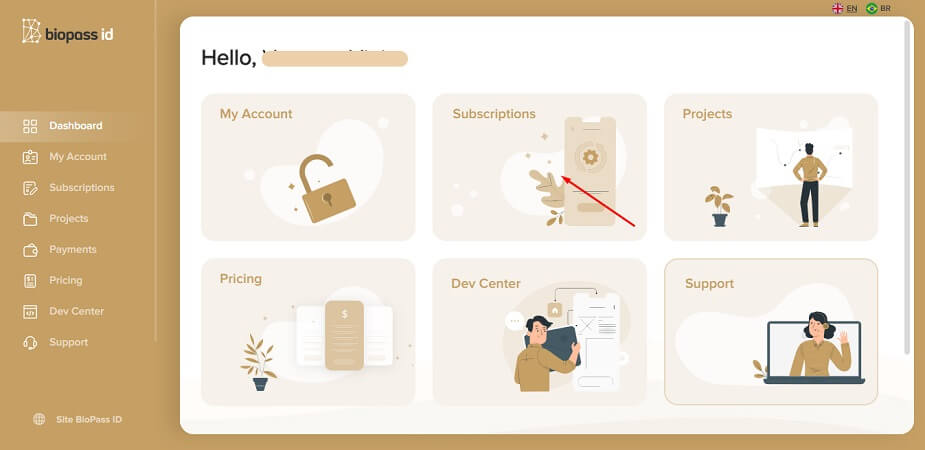
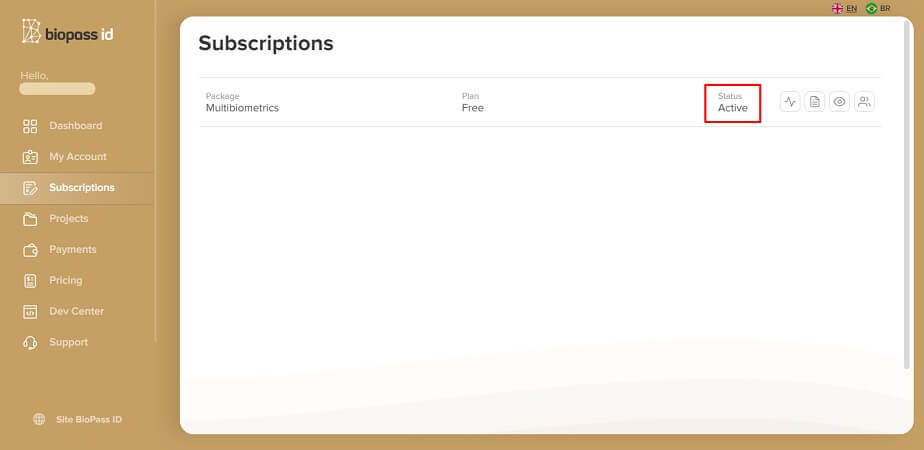
Once the registration is complete, check that the status is active in the "Subscriptions" tab.
2. Create the project
For better organization, create multiple projects with the same signature. Each one allows you to create multiple applications with a single access key each. This way you can track the usage of each project and application independently, as well as better access control.
So let's get to it!
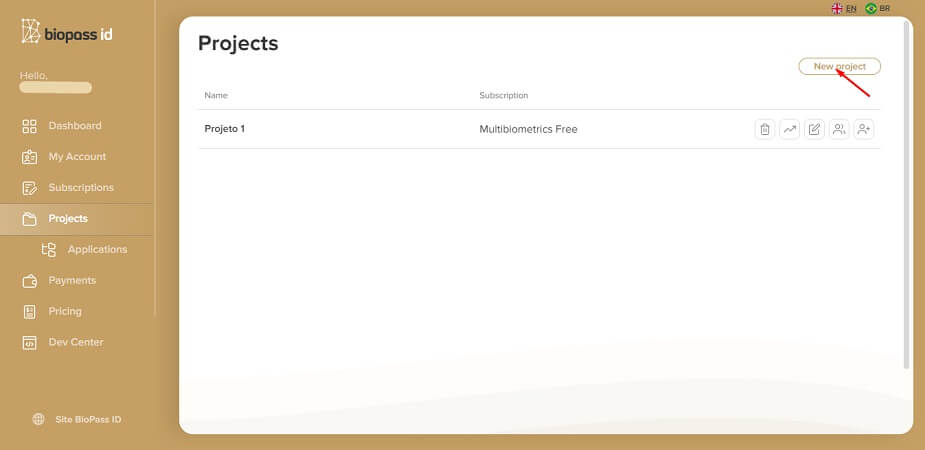
With the subscription status active, create a project to access the biometrics API.
Click "New project" and fill in the required fields. Here's how:
After creating the project, create an Application, which will be responsible for providing the API access key. In the "Applications" tab of the side menu, click "New Application", fill in the fields and choose the project that was created in the previous step. The new application will appear on the screen as shown below:
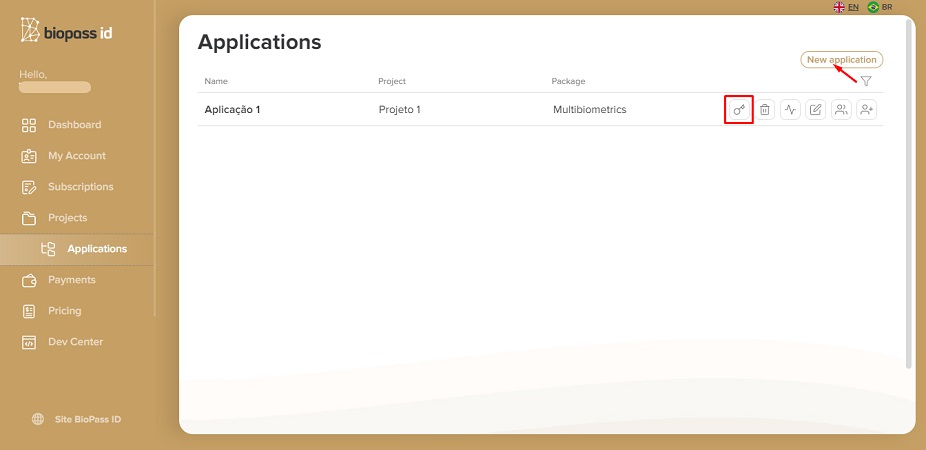
After that, just click the button with the key icon to view and copy the API access key. All set to go!
Apply with Postman
With the access key we move on to setting up the request in Postman, a platform for building and using APIs.
To start the registration, the first step is to send the facial image of an individual. All the details for this request are in this tutorial, but having the API documentation handy is indispensable.
The following steps were done on the version of Postman installed on the machine, but you can use the browser version.
3. Authorize the request
In the authorization header, select the type for the "API key". Then fill in the "Key" and "Value" fields respectively with Ocp-Apim-Subscription-Key and the value of the "API key" acquired from the previous step. Also select the "Header" option in the "Add to" field.
For this transaction, use the "POST" method and the url https://api.biopassid.com/multibiometrics/enroll, as described in the documentation. See below the result of these settings:

4. Set the parameters
The information in the body of the request is passed in JSON format (acronym for JavaScript Object Notation), a data formatting standard widely used in the exchange of information between systems because it is lightweight and easy for humans and machines to understand.
Now, the body of the operation has a structure of Person type that represents an individual and his/her biometrics, where the CustomID variable is included.
This variable is nothing more than a set of characters known as a string, used to identify an individual. It is important to know that the CustomID must necessarily be unique. For this, it is recommended to use the Social Security Number of the user to be registered.
Finally, a collection of character sets, the variable Face, that is, an array of strings, stores the user's facial images. See an example of the structure in the image below:
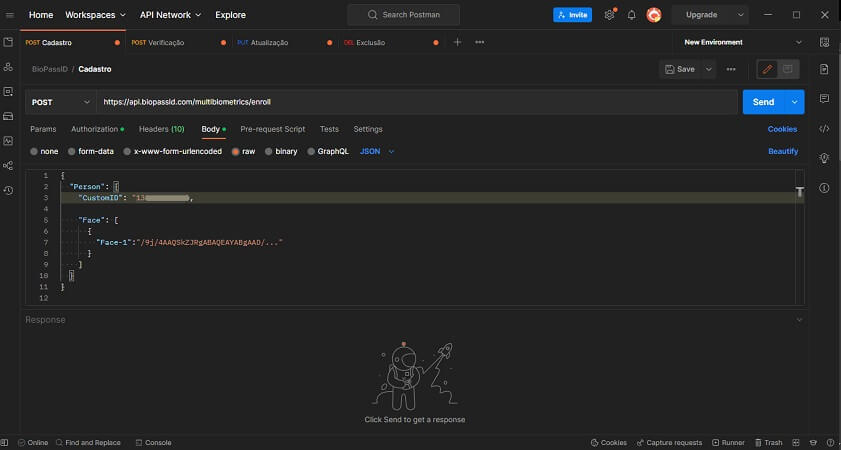
If you send more than one capture, assign Face-1, Face-2, and so on.
To make it easier, have the following operation code available:
5. Convert the image to base64
To embed an image in a JSON-formatted text file, you need to convert it to base64.
Base64 is an encoding algorithm that transforms different file types and characters of any language into a Latin alphabet, digits and signs. With this we can convert images into a sequence of computer-readable characters that can be saved and/or transferred anywhere.
It is often used to transmit binary data through transmissions that deal only with text, such as requests in APIs.
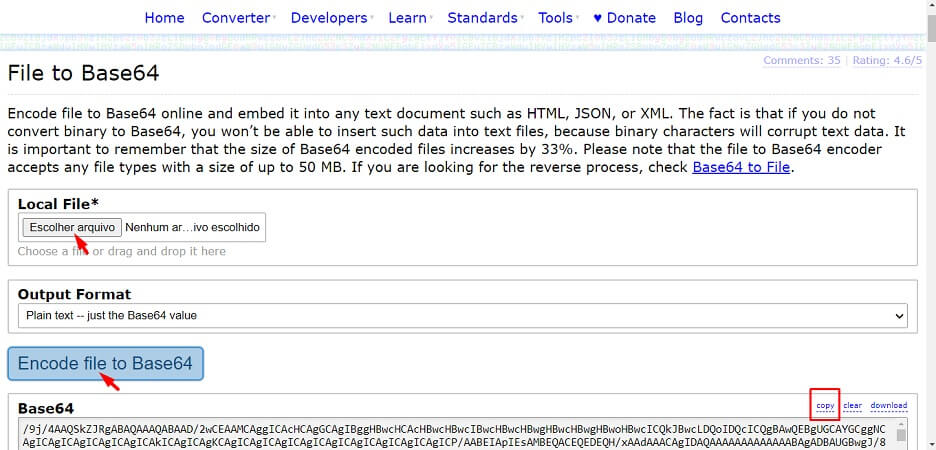
There are several websites that perform this encoding quickly and efficiently. For the step-by-step, the converter from this link will be used: https://base64.guru/converter/encode/file. Once you are on the page, simply:
- Choose the face image file.
- Click on the button "Encode file to Base64".
- And copy the content.
6. Request Response
It is always important to evaluate the response code of an API call, because it is through this code that we know if the operation occurred or not as expected.
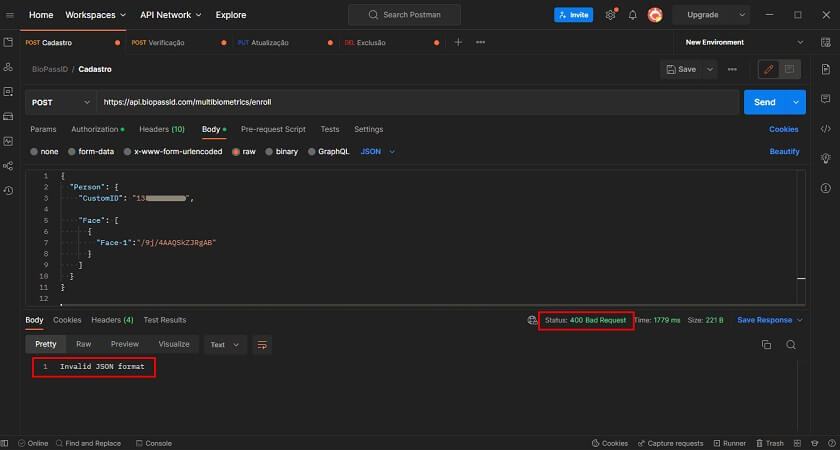
In case of error, the response status will return a three-digit numeric code starting with the numbers 4 or 5. An example of failure for this type of request is the return of the message "Invalid JSON Format".
The error occurs when the base64 of any of the Face or Fingers fields is empty, with punctuation errors, over or under characters. The following image demonstrates this situation:
Other types of errors and their causes can be found in the BioPass ID documentation.
Now, if all the variables in the request body are correctly filled in and there is no error in the configuration of the call and in the syntax of the sent JSON (the request body), you get as response the status "200 OK" and the Person object with three fields:
- CustomerID
- CustomID.
- BioPassID.
Take a look at the image below to better understand what a successful operation should look like. It shows the content of the request and the response.

With the steps completed and a successful request, you have an individual's facial biometrics record stored and can later verify their identity based on this initial record.
Get to know and test all the resources that the Biometric API package offers.


