Biometric APIs (Application Programming Interface) allow you to authenticate and authorize several types of applications safely. They coordinate a biometric verification prompt and provide a great experience by supporting multiple types of authentication of individuals, such as fingerprint and face biometrics.
The step-by-step described here shows how to test some of the basic record management operations, also known as the CRUD of a Biometric API.
What is CRUD?
CRUD is the acronym for Create, Read, Update and Delete. These are the four main operations that usually can be handled in a database.
In short, CRUD is a set of operations formed by basic requests that an application makes to a database.
Now that you understand what CRUD is, understand in 4 steps how to test basic operations and how they work in a biometric API through Postman.
1. Enroll the biometric into the Biometric API
The first CRUD operation is related to creation. Creation refers to registering an individual in the database.
This procedure was developed in another tutorial entitled: How to register an individual's facial biometrics with Postman.
The article will show a simple step-by-step process of registering a user in just 6 steps.
Moreover, the content goes from creating the account for receiving the API access key to adding a person and their facial picture to the biometric platform by Postman.
2. Verify the biometrics in the Biometric API
Once the first operation has been completed, you can start the verification.
The function allows you to verify that the biometric data provided in the request actually belongs to an individual previously registered in the system, both for fingerprints and face.
In this comparison you must include at least one facial image, since in the registration phase we use a face. Otherwise, an Invalid JSON format error message will be returned and the procedure will not be completed successfully.
Start the verification by the authorization header that must be filled in according to step 3 of the registration tutorial. On this occasion, just change the url end to verify: https://api.biopassid.com/multibiometrics/verify.
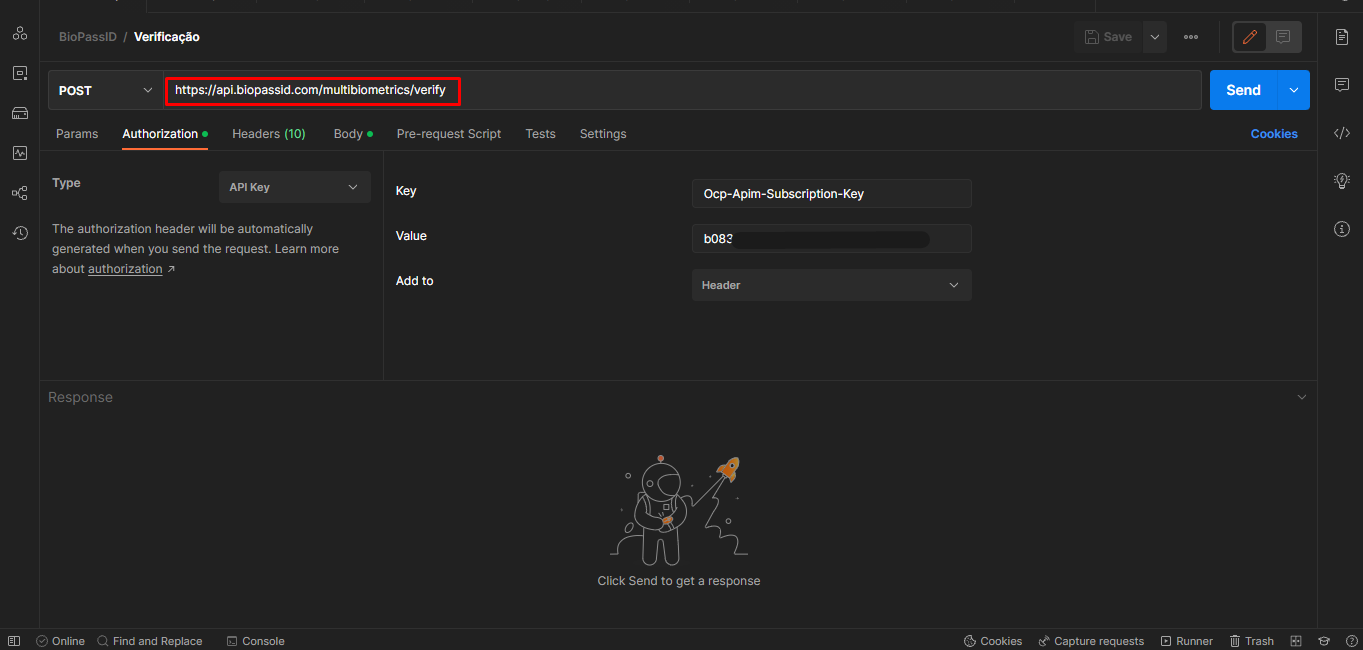
The parameters in the body of the verification request look similar to those in the registration. So we can also follow step 4 of the registration tutorial by changing only the content of the variable Face-1, which is the image transformed into base64.
To convert the image that will be used as a comparison, you only need to convert it to base64 so it becomes a computer-readable string of characters.
Learn more in the article: How to register a user's facial biometrics via Postman.
If the request is successful, you will get the Person object as a response with the following fields:
- CustomID: a string with the identifier of the registered individual.
- Match: a boolean that indicates if the biometric matches the one of the indicated person.
- MatchDetails: an object that details the comparison between biometrics that has the FaceMatched and NonMatchedFingers parameters.
- Success: a boolean that determines the success of the transaction.
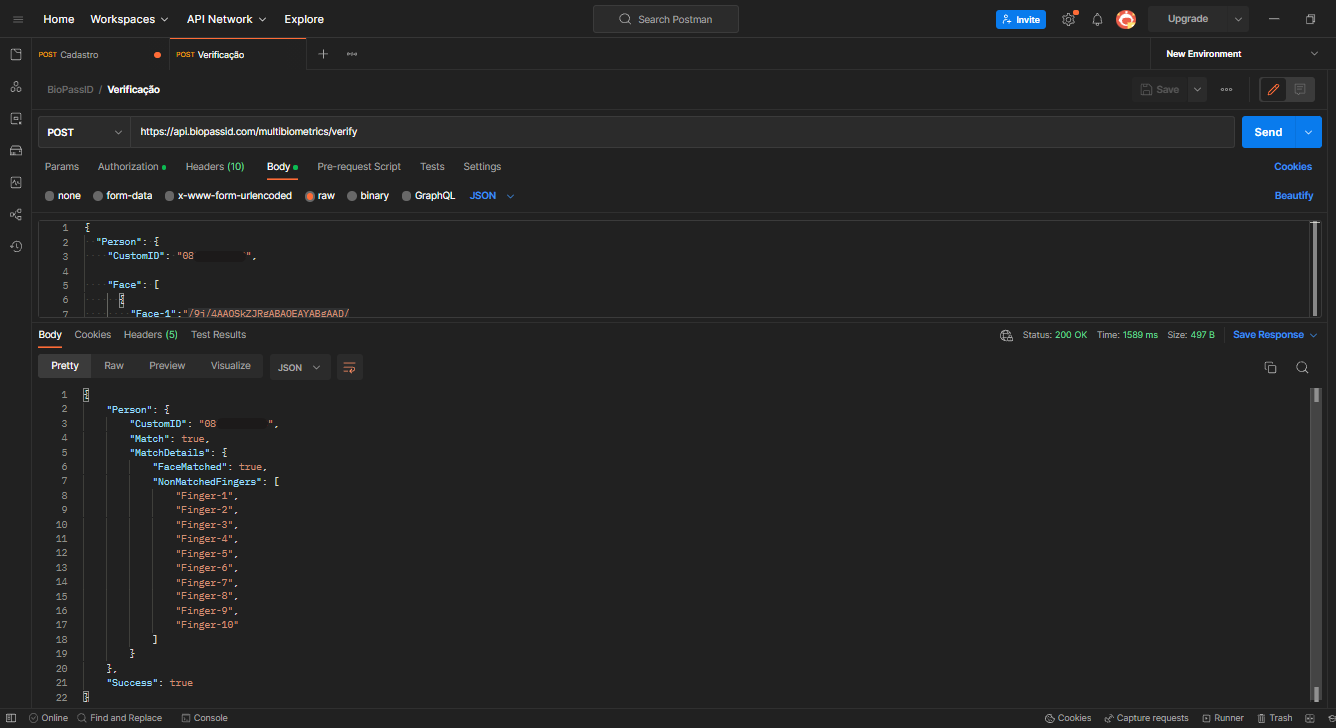
In case of failure, you will receive the status '400 Bad Request'. In the body of the response, the message will indicate the presumed reason. In the example below, the reason was that the person to be checked did not exist in the database queried, returning the error "Person not found":
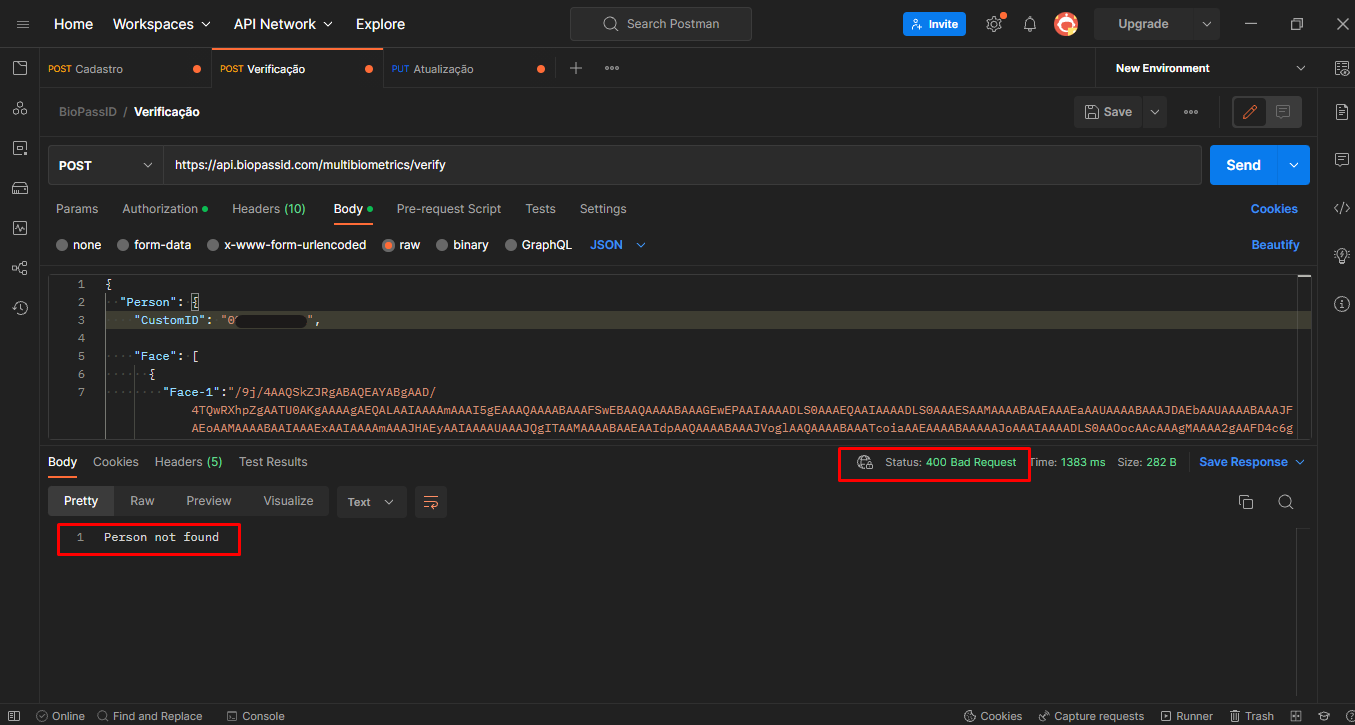
For all errors and descriptions, please check the BioPass ID API documentation.
With this step complete, proceed to the update.
3. Update the data in the Biometric API
To edit an individual's data, use the PUT method and the URL https://api.biopassid.com/multibiometrics/update.
At this point, change just what you want in the parameters of the request body. The syntax will be the same as for previous operations.
In the transaction, it is essential that at least one fingerprint or face image is entered in the body of the request. Otherwise, the API will return the error message Invalid JSON format.
As in the registration, the success response will show a Person object with the fields:
- Client ID.
- Custom ID.
- BioPass ID.
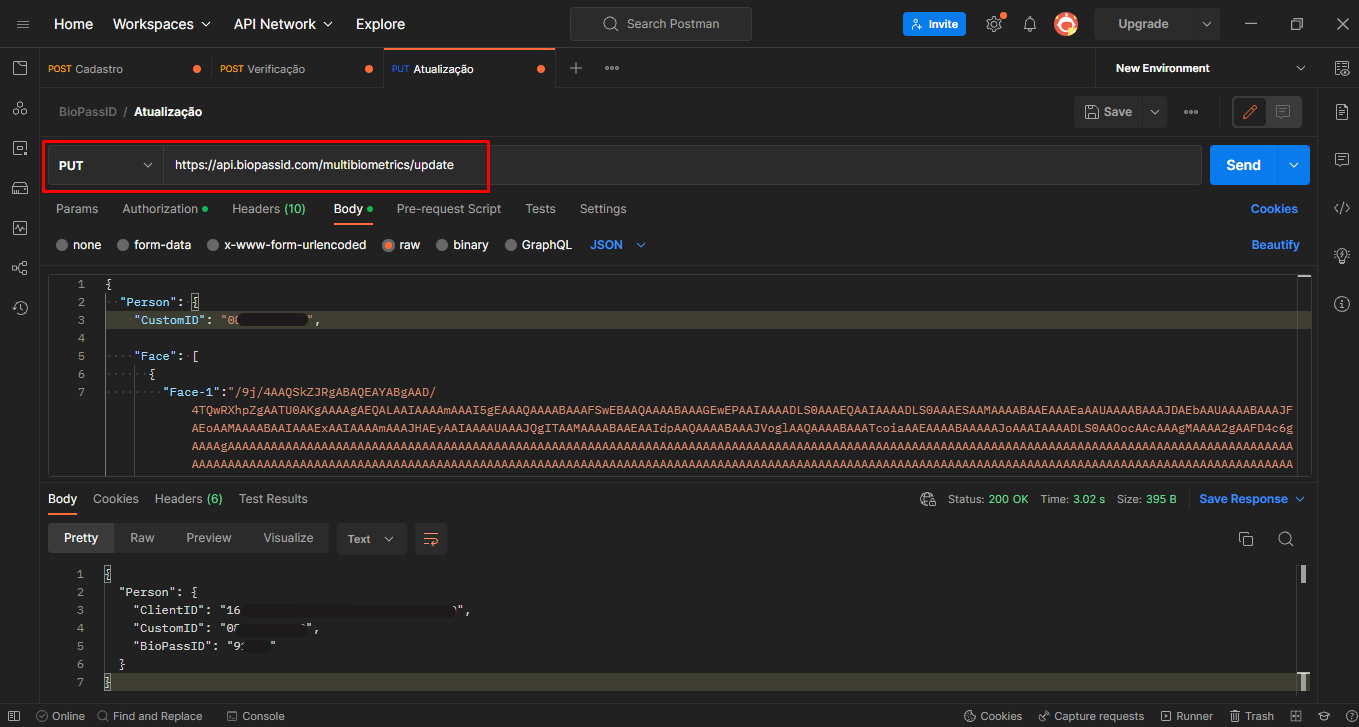
In case of failures or questions regarding the response message, please check the details in the documentation. And if the error persists, please contact BioPass ID API support for help.
4. Delete a biometric in the Biometric API
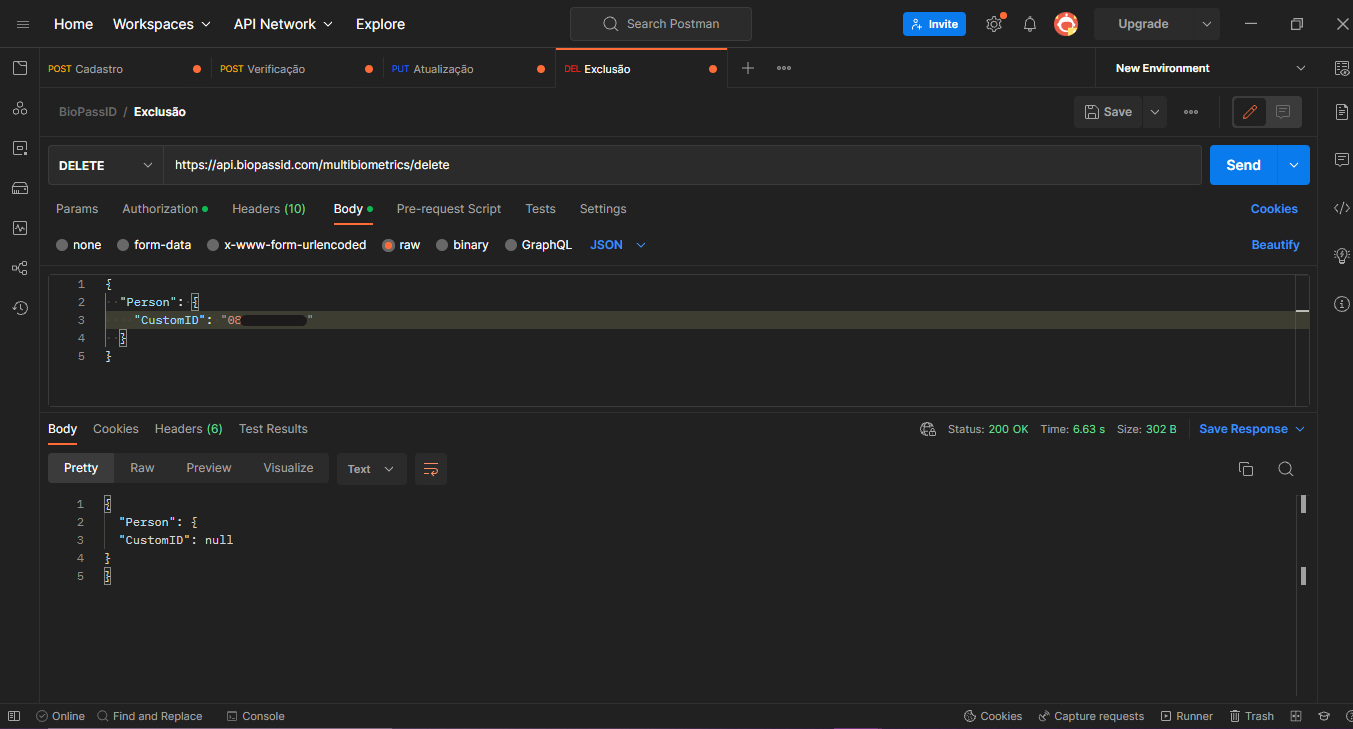
Deleting a biometric in the API is the simplest transaction. It does not require filling in the Fingers or Face fields.
To delete a person from the biometrics platform use the DELETE method and the url https://api.biopassid.com/multibiometrics/delete. In the body of the request you only need to inform the identifier of the registered individual.
If the request succeeds, you will receive the status "200 OK" and in the body of the response there will be a Person object with the null CustomID field as in the image below:
Some failures can happen in this operation, such as:
- Invalid JSON format.
- Unable to connect to the database.
- Person not found.
The following screenshot illustrates an unsuccessful request in which the identifier entered in the system could not be found.

5. Apply it to Postman yourself
You learned in this article about what CRUD is and how to use its features when it comes to a biometric platform.
I also explained in a step-by-step instructional way how to test basic operations in a biometric API via Postman, such as enroll, verify, update, and delete a biometric.
Now, be sure to test the several other operations of the Multibiometric Package in BioPass ID and see you in the next tutorial.


